Showing posts with label Crafting with the Stars. Show all posts

Thursday, October 20, 2011

Old Window Headboard

Sadly, this is my last entry for Crafting with the Stars. :(  Bummer...but, I still lurve the project!!

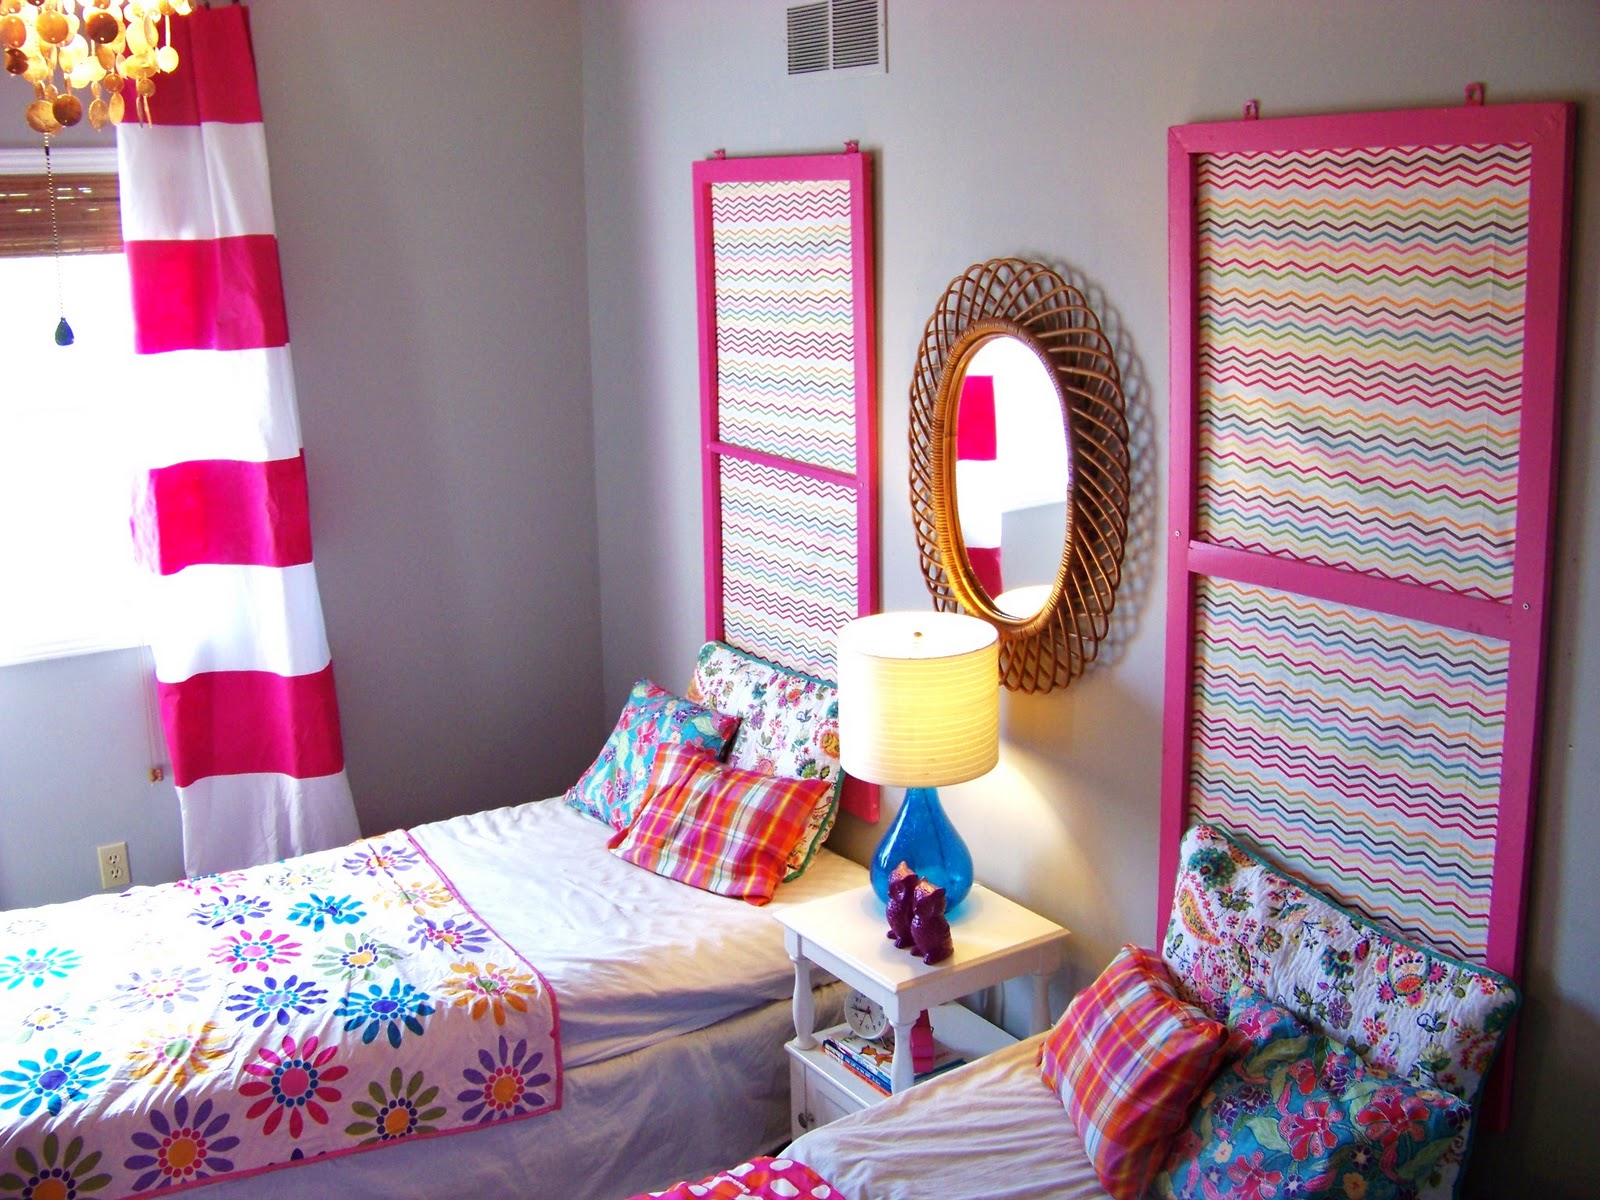
I struggled this week....like, a lot! I was going to paint some fabric and that didn't go as planned...I don't sew. My sewing machine is basically a giant paper weight, so I needed to be a little more creative. So, I made my daughters some headboards and painted them some curtains!!


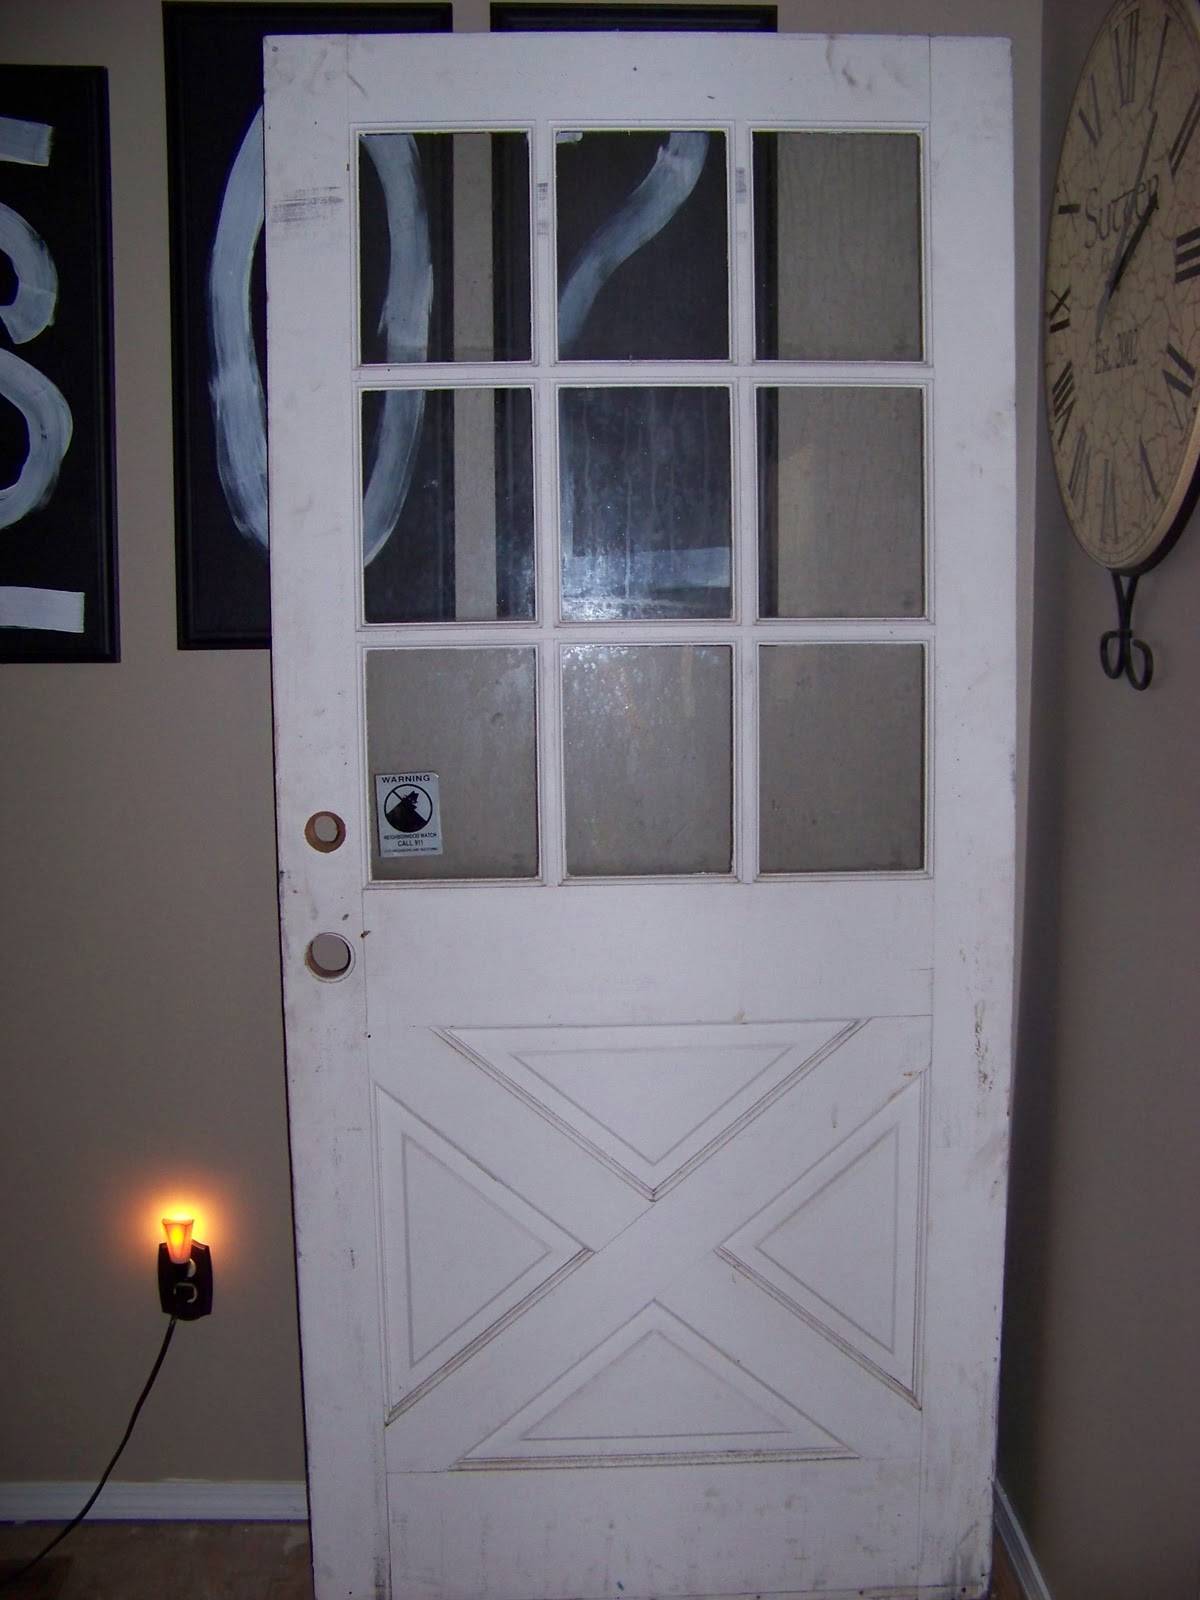
I painted the striped curtains with hot pink paint and a white twin top sheet from Wal-Mart. After I painted the striped curtains, I painted the old window frames I picked up at a flea market for $10 each. They started red and I painted them white originally.  I used them in our bedroom as the headboard.


I'm thinking of making a tufted or different headboard for the master bedroom now!


For this, I switched it up to a much more girly pink! I planned to paint a multi-colored chevron to use for the headboards...epic fail. 


My inspiration for this project was this amazing set from PB Teen:


I may have had a mild nervous break down.


After I decided it wasn't the end of the world, I headed to Joann's for some fabric. While I am perusing, but what to my wondering eye should appear, but a perfect striped chevron and eight tiny reindeer. Seriously, they already had their Christmas crap out! I passed on the reindeer and picked up the fabric and a few more fun ones for pillows! For the headboard, I just stapled the Chevron fabric to the back of the old windows and screwed them to the wall. I took the lazy way out on the pillows...heatbond tape. It's my guilty pleasure...no sewing just my trusty iron. The iron only gets used for heat bond and to iron on Girl Scout patches....I do not iron our clothes. Oh, no my secrets out :) The girl's love their new room and I couldn't be more pleased and I only had one mildly neurotic episode!! 


We're not quite done with their room...I'm thinking they need this piece of art work and a few more ideas I pinned from pinterest!


I'm thinking it would be easy to add these to a pre-made white quilt or comforter!
Mama may not sew, but she can modify!


-Make your life beautiful!!

SUNDAY: 
The Girl Creative ,The DIY Showoff ,Sisters of the Wild West ,The Tattered Tag ,Flamingo Toes, Under the Table and Dreaming I Heart Nap Time 

 MONDAY:
Skip To My LouThrifty Decor ChickC.R.A.F.T.Sew Can DoDittle Dattle, Between Naps On the Porch, Homemaker on a Dime,  Making the World Cuter


TUESDAY:
Tip JunkieType AA Bowl Full of LemonsToday's Creative BlogFunky Polkadot GiraffeStrictly HomemadeA Diamond in the StuffAll Thingz RelatedHandmade Tuesday,
WEDNESDAY:
Blue Cricket DesignNot Just A HousewifeSomeday CraftsHandy Man, Crafty WomanSew Much AdoOrganize Your Stuff NowSeven Thirty ThreeSugar and Dots The Mommy Club  
THURSDAY:
My Repurposed LifePaisley PassionsHouse of HepworthsBeyond The Picket FenceThe Shabby Chic CottageSomewhat Simple, Inspired by Charm

FRIDAY:
Remodelaholic, Fingerprints on the FridgeMiss Mustard SeedChic on a ShoestringShabby NestTidy MomLittle Lucy Lu, My Simple Home Life

SATURDAY:
Funky Junk Interiors, be Different Act Normal, Tatertots and Jello, Young and Crafty


Tuesday, October 18, 2011

Silly me....

I totally spaced out to tell you to go vote over at Sew Dang Cute for Crafting with the Stars!!

Thank you so much!!

-Make your life beautiful!!

Thursday, October 13, 2011

Crazy Amazing Play Kitchen for CWS

Woohoo!!  I made it to round 3!!  


The theme for round 2 was Upcycle and I knew exactly what I wanted to do.  I had seen so many amazing play kitchens out in blogland, that I decided to finally make one for the girls.  Morgan and Hayley actually play with it, Audrey likes to open the cabinet and sit inside the play kitchen!

My sister in law donated her old entertainment center for the cause!  She has 2 super active boys and the entertainment center had seen better days.  Mr. TSL picked it up and brought it home for me....it wasn't in as bad a shape as I had thought.  It was solid oak!  Mr. TSL almost wouldn't let me paint it.  What is is with men and wanting wood to be au natural...no painting nice wood (in my best caveman voice). Just kidding Mr. TSL, I still need some help with other projects and I'm not burning that bridge!


Now for the boring how we did it.
1.  Took off old hardware and primed in with spray Kilz (already had this for my dining room chair project...now I need more)

2. I painted the silver first, it was just a can of silver spray paint that Mr. TSL has in a cabinet in his man garage.  Apparently, he is a collector of all things spray paint.  Our poor children will grow to be spray paint hoarders, just like their mommy and daddy :)

3.  I taped off the edges of the flat top range and the oven windows, then painted the white countertop and black cabinet base.  The black took 2 coats and the white took 3.  (the black was from painting our own kitchen cabinets, but I used it for my Nate Berkus rug from last week and I also painted my front door with it the other day, more on that later.  The white paint is the trim paint for the living room trim!)

4.  I decided, I was sick of taping off stuff...last week the rug, this week the kitchen...so I took one of those stinky fat permanent markers and a ruler and made the top of the stove like that....soooooo much easier!  

5.  The handles for the cabinets and drawer were for my grandmothers antique Hoosier cabinet that is in my kitchen...they didn't fit, so they have been in the darwer for 2 years and the Hoosier cabinet still has no handles...so they weren't a new cost either.

6.  I decided to paint a faux carrera marble counter...that didn't work. it was terrible.  So, I painted over it a few times with some more white paint.  

7.  Mr. TSL cut the hole for the sink with a jigsaw and we dropped in a cheap pie pan I picked up at Wal-Mart for $0.97...first cost for the project.

8.  The chalkboard was leftover wood from when I took apart a home made bed frame the previous owners left in the rafters of Mr. TSL's man garage.  We tried to use it in Hayley's room, it was too big and she and I suffered serious injuries from the bed.  Okay fine, we both hit our shins, but that puppy left big bruises and I might have been rolling on the floor in pain.  I just painted it with some paint we had and the leftover chalkboard paint from the pantry door project.  

9.  The little pendant flags are cut up paint swatches from Lowe's 

10. The knobs for the stove are made from baby food lids that I spray painted black and the hot glued tile spacers on!!  :)   

11.  Last, but not least is the item that made the whole kitchen....the faucet and handles.  Mr. TSL made this in his welding class.  That's right he made that for me,er the girls!  He stayed after school and forged this thing for the kitchen....it is amazing!!  I cannot even describe to you how awesome it is!!  He brought it home and I wanted to make out with him!!  

So, there it is!  My Round 2 Upcycle Project for Crafting with the Stars!

Next Week is.....

I am kind of freaking out....I do not have mad sewing skills. 
 I have already gone postal on my project once this week.  :)


-Make your life beautiful!!


SUNDAY: 
The Girl Creative ,The DIY Showoff ,Sisters of the Wild West ,The Tattered Tag ,Flamingo Toes, Under the Table and Dreaming I Heart Nap Time 

 MONDAY:
Skip To My LouThrifty Decor ChickC.R.A.F.T.Sew Can DoDittle Dattle, Between Naps On the Porch, Homemaker on a Dime,  Making the World Cuter


TUESDAY:
Tip JunkieType AA Bowl Full of LemonsToday's Creative BlogFunky Polkadot GiraffeStrictly HomemadeA Diamond in the StuffAll Thingz RelatedHandmade Tuesday,
WEDNESDAY:
Blue Cricket DesignNot Just A HousewifeSomeday CraftsHandy Man, Crafty WomanSew Much AdoOrganize Your Stuff NowSeven Thirty ThreeSugar and Dots The Mommy Club  
THURSDAY:
My Repurposed LifePaisley PassionsHouse of HepworthsBeyond The Picket FenceThe Shabby Chic CottageSomewhat Simple, 

FRIDAY:
Remodelaholic, Fingerprints on the FridgeMiss Mustard SeedChic on a ShoestringShabby NestTidy MomLittle Lucy Lu, My Simple Home Life

SATURDAY:
Funky Junk Interiors, be Different Act Normal, Tatertots and Jello, Young and Crafty


Monday, October 10, 2011

Wednesday, October 5, 2011

Nate Berkus Knock Off Rug for CWS

Round one of Crafting with the stars was Knock Off.  The projects were uh-mazing.  As soon as the post went up for voting, I may have been slightly neuroticly worried.....I like a good knock off and I picked Nate Berkus's NY Apartment Rug.  I believe Ikea makes a cheaper version, but I like Nate's space!


My only cost was the painters tape which was $5-ish....I bought a lot of groceries that day and don't remember exactly.

I had the rug from Dollar General that I paid $10 for last year.  I bought it to lay over the NASTY crapet (yep, I meant crapet)  Got it home and of course it was about 1 inch too wide.  Suckola!  I then put it on the porch to catch the sand and dirt from tracking in the house....it still does, but not as much.

The rug when I started was filthy, dirt and sand galore.  I didn't wash it.  I vac'd it like 5 times and it still has sand in it!  Which is fine because it went right back out on the porch.  It's not big enough to warrant keeping it in the house.  Plus, we have very plush/shaggy 80's crapet, so rugs won't lay right.

It's like a light brown color.

Then I started painting and painting.  The paint is just regular house paint.  The white is marshmallow white from glidden and the black is an oops can Mr. TSL picked up for $5 to paint the kitchen cabinets from Lowe's.  Kitchen Cabinet paint no more.  I used it for this project and for next weeks project and I may paint the front door :)  It bubbles anyway, so it wouldn't make good cabinet paint.

After 2 coats of black paint, it was decently covered....remember this is going on the porch and is currently dirty from being there now.

it is actually covered better, but seemed to show brush marks in the crappy pic.
 I measured and divided by 4, so I could make the sections.  Then, I measured and marked it with white chalk...so I wouldn't have to wash it off!

Then I started taping and taping and taping.  After 2 coats of white paint, it looked like this:


Now, I need your opinion on something.......

We scored this amazing door at Habitat for Humanity for $10.  Mr. TSL hung it and I love love it! It's like adding another window in a room with little light!

It's wood on the side facing to dining room and white facing the sunporch.

I plan to either paint it candy apple red or black....what to do?

Here are my inspiration pics.:
RED


or

BLACK


Nate's rugs and inspiration doors via my Pinterest

-Make your life beautiful!!

SUNDAY: 
The Girl Creative ,The DIY Showoff ,Sisters of the Wild West ,The Tattered Tag ,Flamingo Toes, Under the Table and Dreaming I Heart Nap Time 

 MONDAY:
Skip To My LouThrifty Decor ChickC.R.A.F.T.Sew Can DoDittle Dattle, Between Naps On the Porch, Homemaker on a Dime,  Making the World Cuter


TUESDAY:
Tip JunkieType AA Bowl Full of LemonsToday's Creative BlogFunky Polkadot GiraffeStrictly HomemadeA Diamond in the StuffAll Thingz RelatedHandmade Tuesday,
WEDNESDAY:
Blue Cricket DesignNot Just A HousewifeSomeday CraftsHandy Man, Crafty WomanSew Much AdoOrganize Your Stuff NowSeven Thirty ThreeSugar and Dots The Mommy Club  
THURSDAY:
My Repurposed LifePaisley PassionsHouse of HepworthsBeyond The Picket FenceThe Shabby Chic CottageSomewhat Simple, 

FRIDAY:
Remodelaholic, Fingerprints on the FridgeMiss Mustard SeedChic on a ShoestringShabby NestTidy MomLittle Lucy Lu, My Simple Home Life

SATURDAY:
Funky Junk Interiors, be Different Act Normal, Tatertots and Jello, Young and Crafty

Round 2 of Crafting with the Stars


So, I made it to round 2!  I am super excited.  But, out of 12, I was 9th.  The bottom 3 were eliminated.  Yes, mathematicians...I was last out of those moving on. {wiping a bead of sweat from my brow...} So, that means I need to step it up a bit.  I take sucky pictures...I do.  Mr. TSL takes fan-freakin-tastic pictures...he may be in charge of my pics this time.  :)


The next round is Upcycle, my project is almost done!


So, if you've been following CWS I made the Nate Berkus Knock Off Rug.  I'll be writing a post for that when I am done with this one!


-Make your life beautiful!!
 

Monday, October 3, 2011

Meal Making Monday Crab Alfredo

Don't forget to stop by Sew Dang Cute and vote for the best projects in Crafting with the Stars!!


I hate jar alfredo.  It's not very delicious. It's not awful, but this is soooo much better.
We eat at Bella Luna every once in a while and Morgan usually orders the 6 cheese pasta.  It's delicious, but I figured I could totally make it.  :)  I made this and she said that it was better than the 6 cheese pasta!

My pic isn't the best, but it's worth trying the recipe. Promise :)

I made this on Friday and it was one of those days, so excuse the pic.  I was making it and decided to share the recipe with you, I forgot to take pics of the process or the kids eating it.  Oh well.

This serves like 6-8 people.  So if you need less, cut it in half!
Homemade Crab Alfredo with Bowtie Pasta

2 pkg cream cheese
2 cups chicken broth
1 cup milk
2 tbsp butter
1 jar of parmesan cheese
garlic powder
cayenne pepper
crab
bowtie pasta

1. Cook the bowtie pasta with the directions on the package.  I only chose bowtie because that's what the 6 cheese alfredo used at Bella Luna.

2. In a large skillet melt the cream cheese with the chicken broth.  This will look nasty at first, like runny cottage cheese.  I use a whisk and just keep stirring until it's mixed better.

3. When the cream cheese is mostly melted add the milk, butter, and parmesan cheese.

4.  When those become melded together into deliciousness sprinkle the garlic powder and cayenne pepper.  Be a little conservative with the cayenne...I like the heat, the kid's whine about it.

5.  Chop up the crab.  (I use imitation crab, real crab is reserved for eating it by itself.  Immitation crab is for this and crab ragoon-we'll do that recipe later!  :)  )

6. Drain the pasta and add to the sauce.  EAT!!

-Make your life beautiful!!
 

Friday, September 23, 2011

Crafting with the Stars (A Girl and a Glue Gun!!!)

Week 1's theme is Knock Off


I'm all over it!  I am super excited about it :)
I have been known to knock off a thing or two....


Plus, I am working with Kimbo over at A Girl and a Glue Gun!!!
She has mad glue gun skills and that is my favorite tool to use when crafting.  In fact, I have hot glued entire Halloween costumes with a glue gun :)


-Make your life beautiful!!